Want to know the secret to filming great TikToks consistently? It’s not about having the most expensive gear or being a video editing wizard. It’s all about having a solid plan before you ever hit record. A clear, repeatable system is what separates creators who burn out from those who build a real presence.
Putting in a little effort upfront with structured pre-production and a lightweight script will save you a ton of headaches later. More importantly, it helps you nail that all-important hook in the first few seconds.
Your TikTok Pre-Production Workflow
This is where the magic really begins. Pre-production is the process of turning a fleeting idea into a concrete, filmable plan. It’s where you define your video's purpose, map out your shots, and get your gear ready to go. Think of it as building the foundation for a polished, professional-looking video.
Honestly, a few simple checks and the right camera settings can make your phone feel like a pro-level tool.
Here’s what I always run through before a shoot:
- Idea Vetting: Does this idea actually resonate with my audience? Is it tapping into a current trend that makes sense for my niche?
- Shot List: I sketch out every single clip I need. This way, I’m not standing around guessing what to film next. It ensures I get every angle and detail.
- Script Outline: This doesn't have to be word-for-word, but I always outline my opening hook and the key points I want to make.
- Gear Prep: A quick check to make sure my tripod, ring light, and microphone are all charged and working perfectly. Nothing kills momentum like a dead battery.
This whole process is about minimizing decisions when the camera is rolling. For instance, if you're planning a cooking tutorial, your shot list would include every single ingredient shot and each step of the prep. For a GRWM (Get Ready With Me) video, you'd plan close-ups on the products and key moments in your routine.
I think of it as a simple, three-step flow: Idea, Plan, and Film.

Starting with a solid idea lets you plan your shots with confidence, which drastically cuts down on wasted takes and frustration.
From my experience, planning every shot before filming cuts my retakes by at least 50%.
The Power of a Shot List and a Lightweight Script
Having a shot list and a basic script is the key to filming in batches without losing your creative spark. I just list each scene with a quick note on the action and what I’m saying. It’s a lifesaver for avoiding those awkward on-camera moments where you forget what you were going to do.
A simple structure works best:
- The Hook: What’s the one clip that will grab someone's attention in the first two seconds?
- The Body: These are the scenes that deliver your main message. I aim for visual variety here to keep things interesting.
- The Call-to-Action (CTA): How will you ask viewers to like, comment, or follow? Make it clear and direct.
Get Your Phone and Gear Ready
You don't need a fancy camera. Just jump into your phone's camera settings and switch to 1080p at 30fps. This gives you the best balance of high quality and manageable file sizes. The most important trick? Tap and hold on your screen to lock the focus and exposure so the lighting and sharpness don't jump around while you're moving.
A cheap tripod for stability and a basic ring light will immediately make your videos look ten times better. If you’re talking, even an entry-level lavalier mic that clips onto your shirt will give you crisp, clear audio.
Before you press that red button, run through this quick mental checklist. It’s a simple habit that prevents so many common filming mistakes.
Essential Pre-Filming Checklist
| Checklist Item | Why It Matters | Pro-Tip |
|---|---|---|
| Idea Clarity | This gives your story direction and purpose. | Just jot down a few keywords on a sticky note. |
| Shot List Ready | You'll save a massive amount of time on set. | I use simple icons or shorthand to make my list scannable. |
| Script Outline | It prevents rambling and keeps you on point. | Try to keep your lines under 10 words for punchier delivery. |
| Phone Settings | This is crucial for getting crisp, professional video. | Always, always lock the exposure before you start. |
| Gear Check | Avoids that last-minute scramble for a charger. | Do a quick audio test to check your levels. |
Taking a moment for these checks ensures you can focus purely on your performance once you start filming.
Putting Your Workflow Into Action
Okay, your pre-production is done. Now it's time to put it all together. I highly recommend scheduling a "batch shoot" day where you film several videos at once. Block out distractions, put your phone on Do Not Disturb, and stick to your shot list.
If you need some fresh ideas, the TikTok Trend Tracker is a great resource for spotting what’s currently taking off.
Remember, this system isn’t rigid. Stay flexible and see what works for you. With every session, you’ll refine your process, and that consistency is what will make your video quality compound over time.
Getting Your Phone and Camera Gear Right
Believe it or not, your smartphone is more than capable of shooting incredible TikTok videos. The secret isn't a fancy, expensive camera—it's knowing how to unlock the power you already have. Your phone's default settings are designed for quick snapshots, not polished video, and that's where most creators miss a huge opportunity.
Spending just two minutes in your settings before you shoot can be the difference between a video that looks fuzzy and amateurish and one that looks sharp, professional, and ready to go viral. Let's get this sorted out before you even think about hitting that record button.
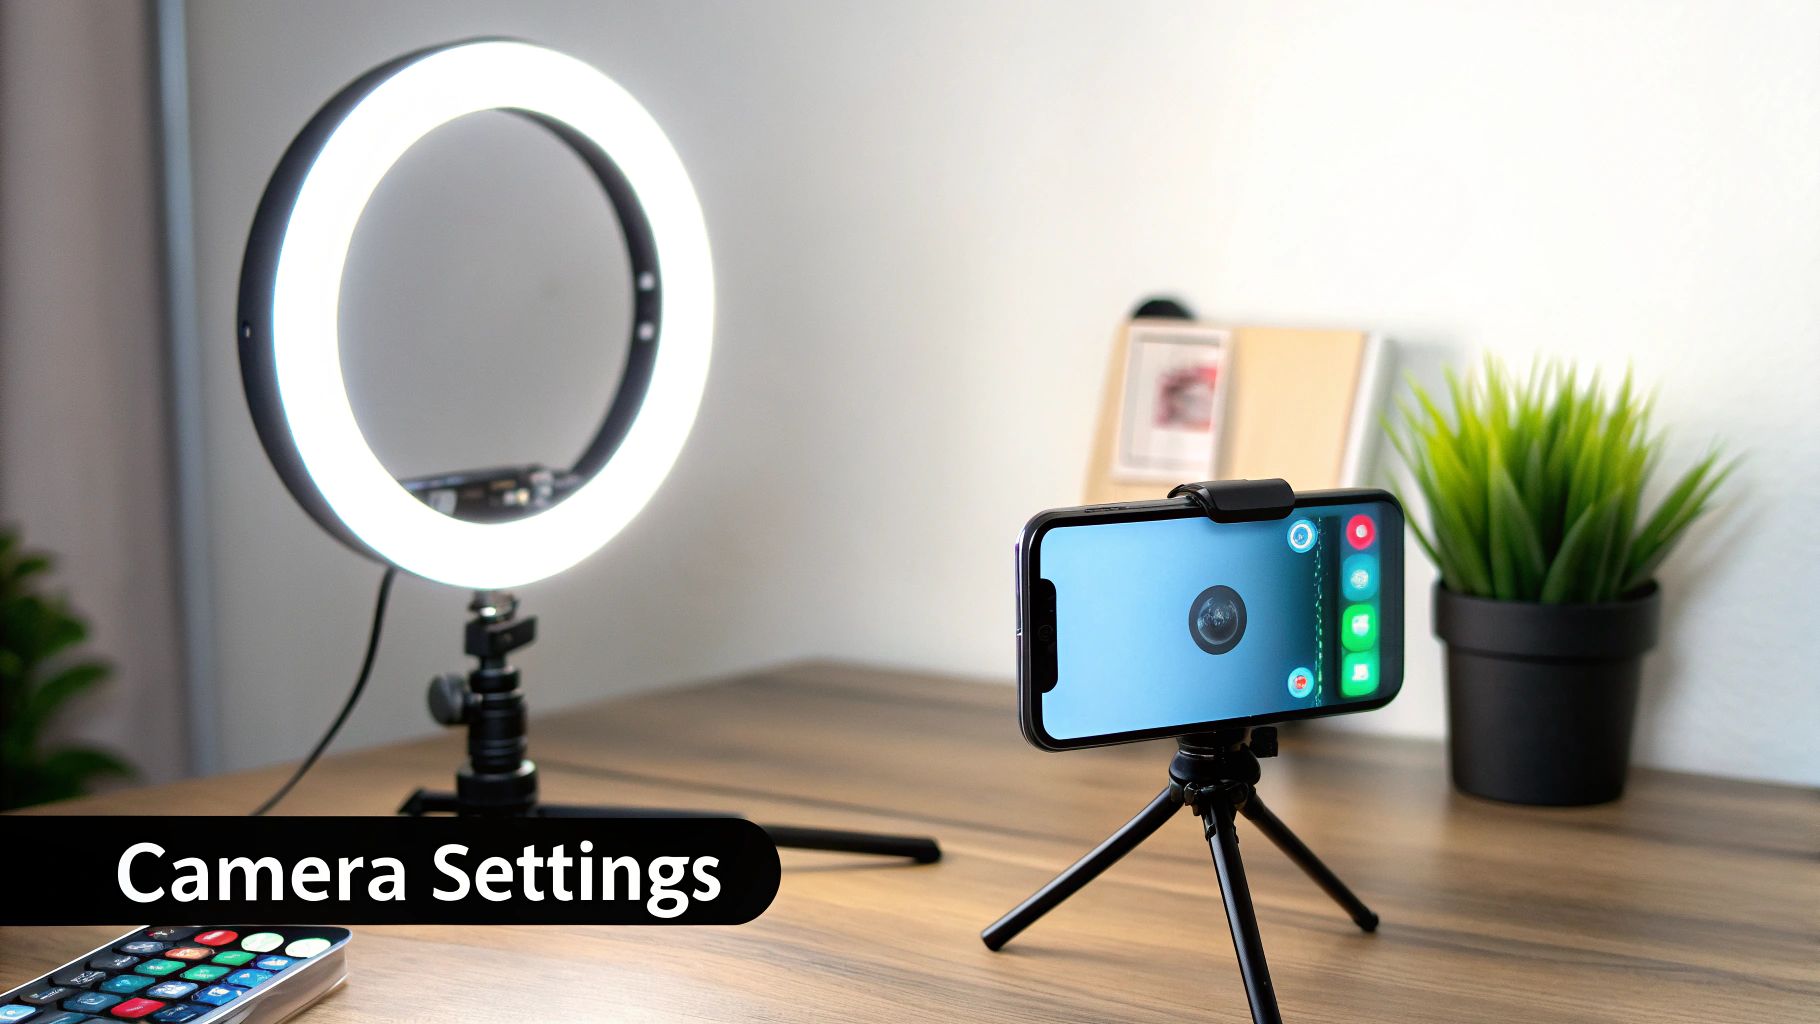
Dialing in Your Smartphone Settings
It doesn’t matter if you’re on an iPhone or an Android; a few quick tweaks will give you much better raw footage. The goal here is to stop your phone from making automatic decisions on its own, which often leads to that annoying flickering or focus-hunting mid-shot.
First, jump into your phone's main settings and find the camera menu. This is where the magic happens.
Resolution: Stick with 1080p (Full HD). I know 4K sounds impressive, but TikTok heavily compresses everything you upload anyway, so you won't see much benefit. What you will see are massive file sizes that eat up your storage and take forever to upload. 1080p is the perfect balance of quality and practicality.
Frame Rate: Set it to 30 frames per second (fps). This is the industry standard for digital video and gives your content a smooth, natural feel that's perfect for the platform. You might see a 60 fps option, which is great for silky-smooth slow-motion, but for regular talking-head or B-roll shots, it's overkill and just creates bigger files.
Now, open your actual camera app. Before you record, tap and hold on your face (or whatever your subject is) until you see a little lock icon appear. This locks the AE/AF (Auto Exposure/Auto Focus). It’s a simple move that prevents your phone from distractingly changing the brightness or hunting for focus while you're talking or moving around.
My biggest tip? Go into your camera settings and turn on the grid lines. Seriously. This little overlay is a cheat code for better composition, helping you use things like the rule of thirds without even thinking about it. Your shots will instantly look more balanced and intentional.
The Only 3 Pieces of Gear You Actually Need
While your phone does the heavy lifting, a few affordable accessories can solve the three most common problems that plague new creators: shaky video, bad lighting, and muffled sound. You don't need a Hollywood budget. These three items will give you the biggest bang for your buck, hands down.
A Tripod for Stable, Professional Shots
Nothing screams "I just started making videos" like shaky, handheld footage. It's disorienting for the viewer and makes your content feel chaotic. A simple tripod is the cure.
It gives your phone a solid base, killing any distracting jitters and freeing up your hands so you can gesture, hold props, or just feel more natural on camera. Find one with an adjustable phone mount so you can easily switch up your angles without a fuss.
A Ring Light for Flawless Lighting
You can have the best content in the world, but if you're sitting in a dimly lit room, nobody will take you seriously. Consistent lighting is non-negotiable.
A ring light is a creator's best friend for a reason: it casts soft, even light that erases harsh shadows and makes you look fantastic. Most come with settings to adjust brightness and warmth, so you can control the entire vibe of your shot. Even a small one that clips onto your phone makes a world of difference.
An External Mic for Crystal-Clear Audio
Here’s a hard truth: viewers will forgive mediocre video quality, but they will not tolerate bad audio. If they can't understand you clearly, they're gone. Swipe.
Your phone's built-in mic is okay in a perfectly quiet room, but it picks up every echo and background noise. A cheap lavalier microphone (the little mics that clip onto your shirt) is a total game-changer. It isolates your voice, giving you that crisp, clear sound you hear from professional creators. It's probably the single most impactful investment you can make.
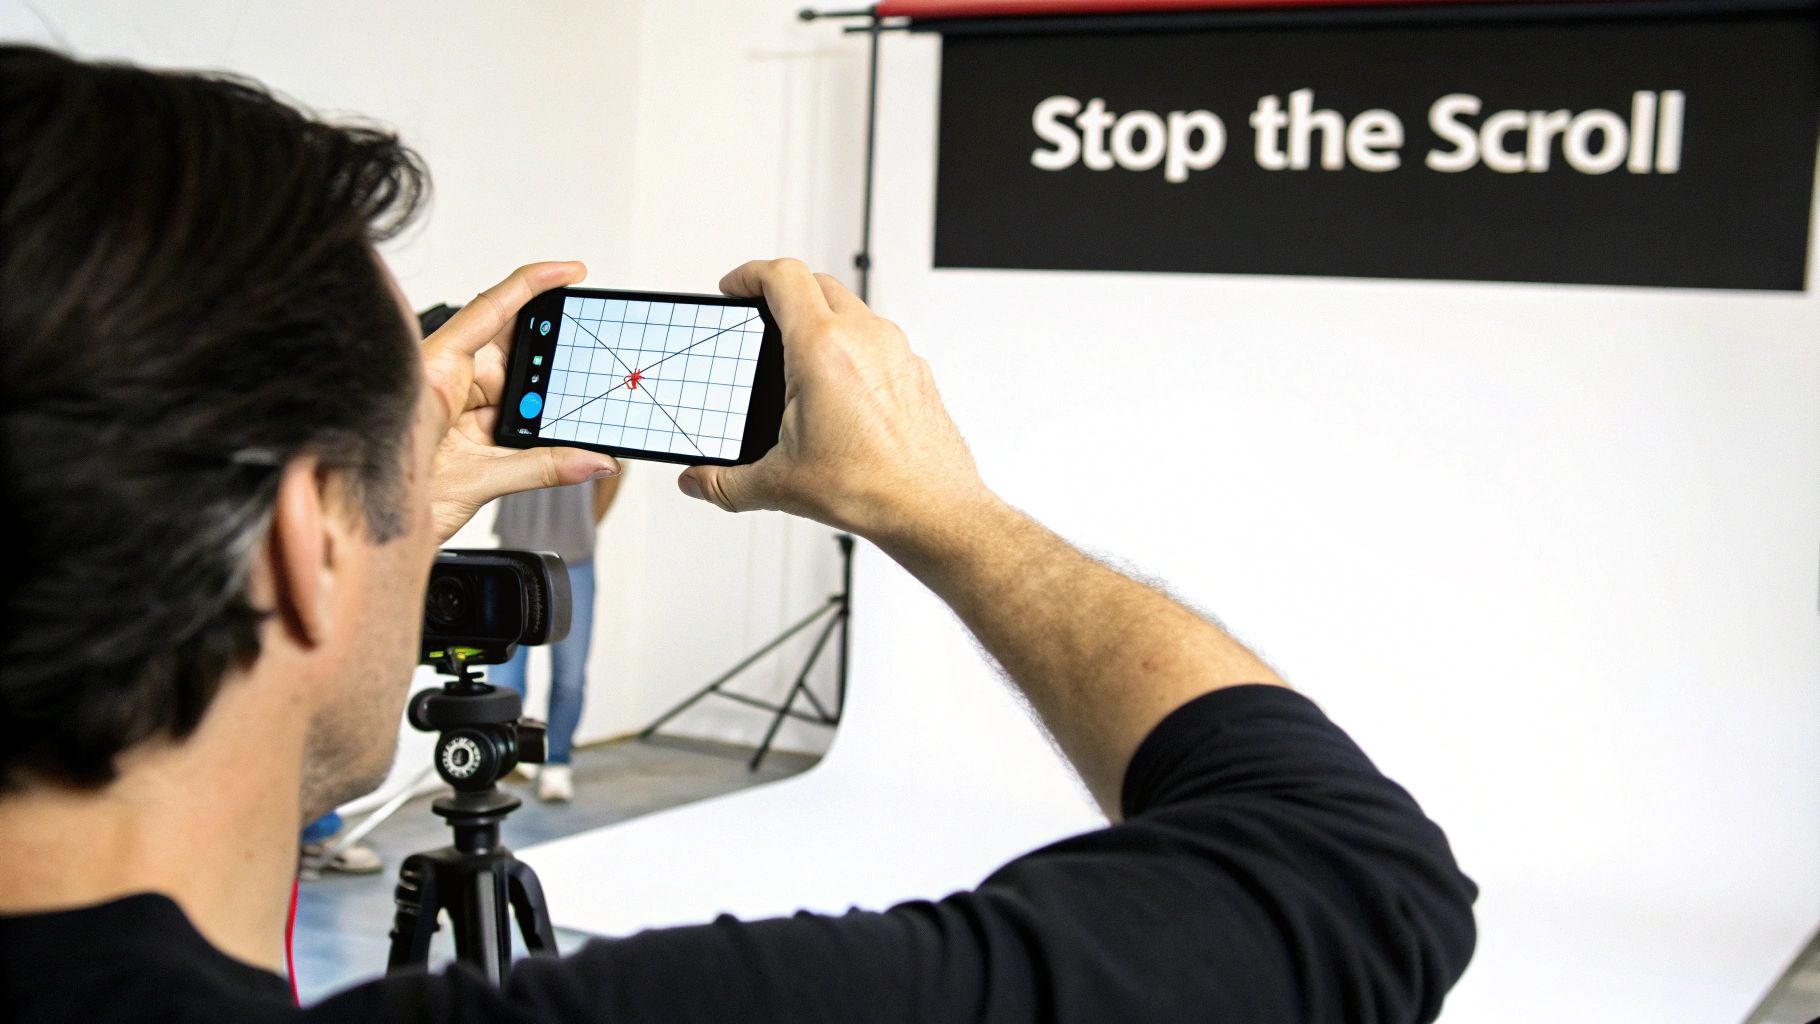
Composing Shots That Stop the Scroll
Let’s be real: a viral TikTok is almost never an accident. It’s the result of smart, intentional visual storytelling. Every single camera angle, every little movement, has a job to do. Once you learn to compose your shots like a filmmaker, you’ll be able to turn a simple recording into something that actually grabs people and makes them watch.
This is about getting beyond just pointing your phone at your face and hitting record. It’s about learning to guide the viewer’s eye, create a specific energy, and tell a mini-story—even if you only have 15 seconds. Getting your composition right is what makes your videos look professional, feel dynamic, and seem like they truly belong on the For You Page.
How to Frame a Shot That Looks Good
Your first step into making your TikToks look better is getting a handle on composition. These are classic filmmaking principles, but they work just as well on a vertical phone screen.
The most important one by far is the rule of thirds. Picture your screen with a tic-tac-toe grid over it. Instead of sticking your subject smack in the middle, try placing them along one of the vertical lines or where two lines cross. It sounds almost too simple, but this one trick instantly makes your shot feel more balanced and professional.
Another great technique is using leading lines. Keep an eye out for natural lines in your background—the edge of a road, a countertop, a fence post—that guide the viewer's eye right to your subject. This creates a sense of depth and makes your shot feel much more thoughtful and immersive.
A well-composed shot isn't just about looking pretty. It communicates information more effectively and holds attention for longer. Shifting key elements just slightly off-center creates a more dynamic visual journey for your audience.
Master Your Camera Angles
The angle of your camera completely changes the vibe and story of your video. Swapping angles is one of the easiest yet most powerful ways to add variety and a little bit of subtext to your content.
- Eye-Level Shot: This is your go-to, neutral angle. It’s perfect when you're talking directly to the camera because it feels like a face-to-face conversation, building a connection with the viewer.
- High Angle: Filming from slightly above can make a subject seem smaller or more vulnerable. Creatively, you can use this in storytelling clips or for that classic, flattering "selfie" angle in vlogs.
- Low Angle: Shooting from below makes your subject look powerful and confident. This is the ultimate "boss mode" angle for dramatic reveals, transformation videos, or making a product look way more impressive.
Don’t just stick to one! Try cutting between different angles in the same video. A quick jump from a friendly eye-level shot to a dramatic low angle can inject a ton of energy and keep people hooked.
Add Some Dynamic Camera Movement
On a platform as fast as TikTok, a static, unmoving shot can feel incredibly boring. Getting comfortable with a few simple camera movements is key to creating that energetic, "native" feel that top creators have.
Push-In: This is where you slowly and smoothly move the camera closer to your subject. It's a fantastic way to emphasize a really important point or build a little suspense. Think about a "secret revealed" video—you could start wide and slowly push in as you spill the tea.
Pull-Out: The opposite of a push-in. You move the camera away from your subject to reveal the bigger picture. Imagine starting on a close-up of a finished meal, then pulling back to show the entire beautiful dinner table setting.
Whip Pan: This is a super-fast, blurry pan from one point to another. It's perfect for high-energy transitions, especially in dance clips or fast-paced tutorials where you're jumping between steps.
Slow Reveal: Use something in the foreground—a wall, a door, even your hand—to block the subject, then slowly move the camera to reveal them. This builds anticipation and is a classic move for "before and after" shots or surprise entrances.
Play around with these movements and see what feels right for your style. The most important thing is that every movement has a purpose. Always ask yourself, "Why am I moving the camera right now?" When you have a good answer, you’re well on your way to composing shots that truly stop the scroll.
Perfect Lighting and Clear Audio: The Non-Negotiables
Let's be real: viewers have a lightning-fast trigger finger for swiping away. Murky video and muffled sound are the two quickest ways to get that swipe. No matter how brilliant your message is, it won't land if people have to squint to see you or strain to hear you.
Good news, though. You don’t need a fancy studio to get a clean look and crisp sound. It’s all about being smart with what you have and learning a few simple tricks. These small tweaks can take your videos from feeling homemade to looking impressively polished.
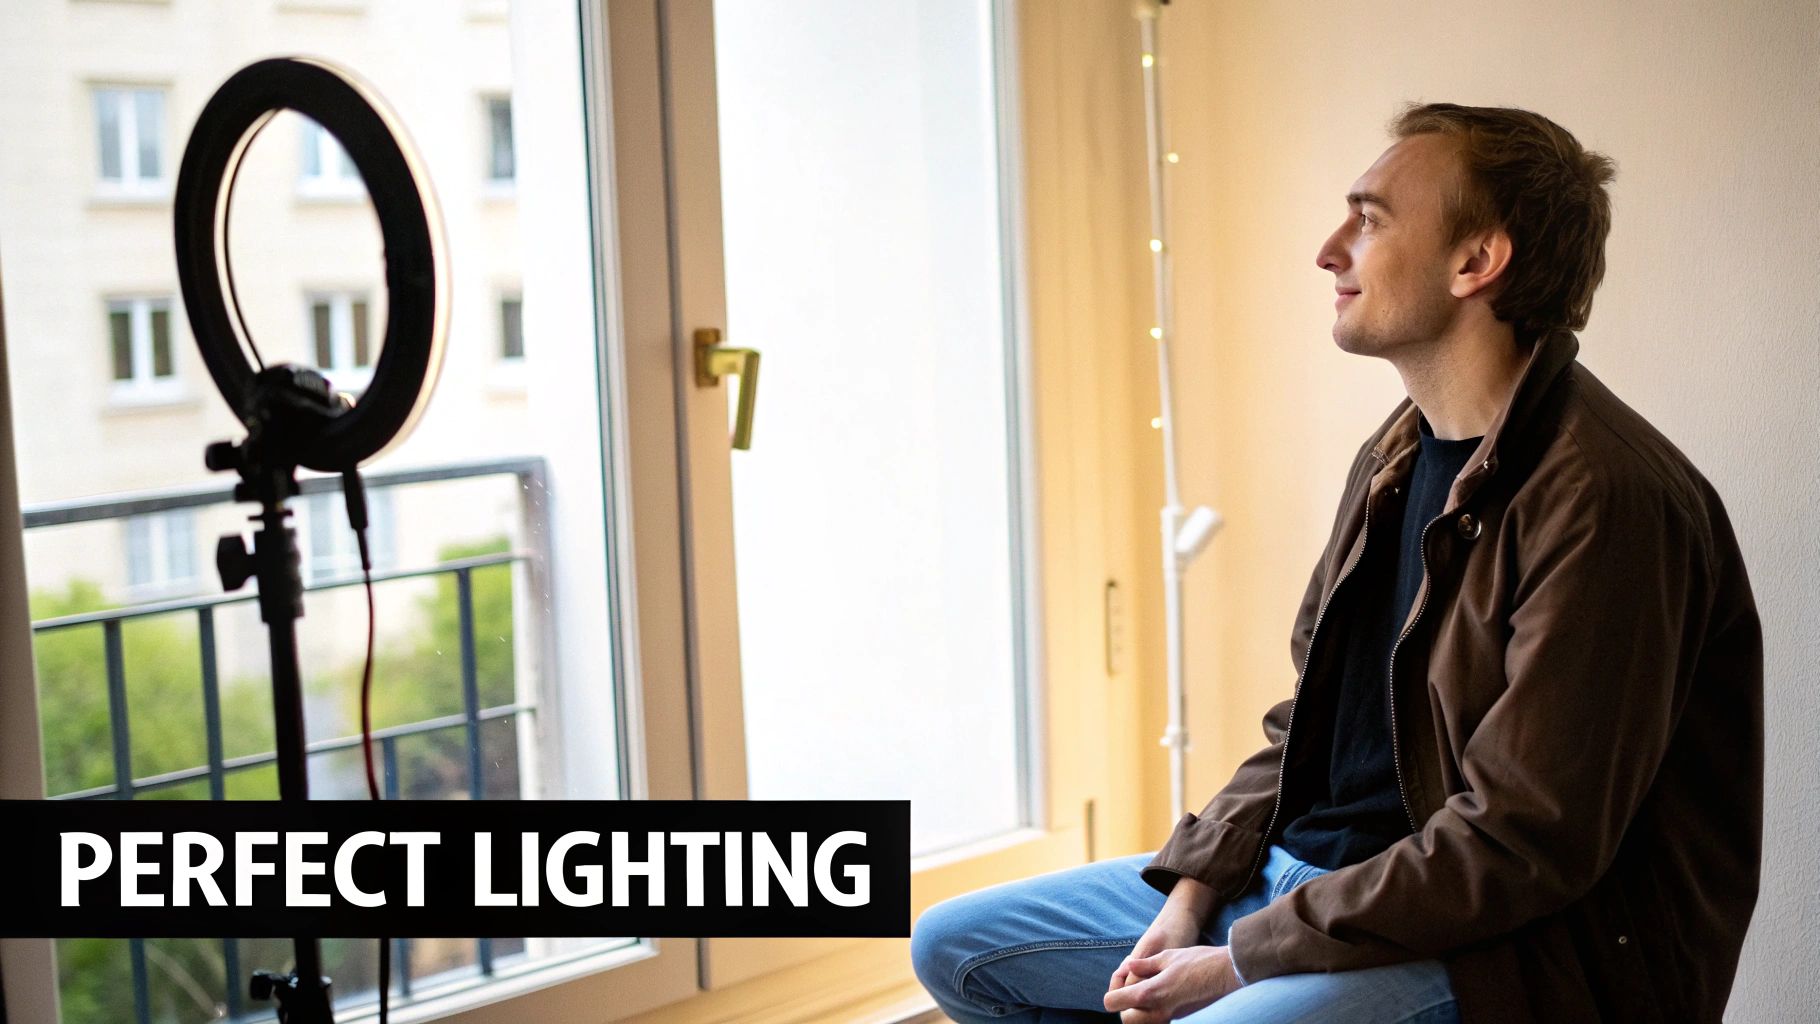
Working with Natural Light
The best light source you have is totally free: the sun. Natural light is soft, it's flattering, and it gives your videos a high-quality vibe that’s tough to fake with a lamp. But just standing in a sunny room isn't enough—you have to know how to use it.
The golden rule is simple: always face your light source. Find the biggest window in the room and set up your camera so you're looking out the window. This wraps your face in beautiful, even light and gets rid of those harsh shadows. Whatever you do, don't film with a bright window behind you. You’ll end up as a dark, faceless silhouette against a blown-out background.
Time of day matters, too. That harsh, direct sun you get at noon can create some really unflattering shadows under your eyes and nose. Try filming mid-morning or late afternoon when the light is softer and more diffused. Your skin will thank you.
Simple Artificial Lighting Setups
Of course, the sun doesn't always cooperate. For filming at night or in a room that feels like a cave, a basic artificial light is a must-have. A ring light is the classic choice for a reason, but how you use it makes all the difference.
- Position is everything: Place the ring light right in front of you, just a bit above eye level. This placement mimics that flattering natural light from a window and gives you those professional-looking circular catchlights in your eyes.
- Dial in your settings: Don't just crank the brightness to 100% and call it a day. Start low and slowly increase it until the shot is bright but not washed out. And don't forget to play with the color temperature—warmer tones can feel cozy and inviting, while cooler tones often look more modern and sharp.
No ring light? No problem. You can get creative. A regular lamp with the shade taken off can work wonders. Just position it in front of you and maybe hang a thin white bedsheet over it to soften and diffuse the light. The goal is always to create a large, soft light source hitting you from the front.
The biggest mistake I see is lighting from directly above. This "interrogation room" lighting creates deep shadows under the eyes and chin. Always prioritize lighting from the front.
Getting Crisp Audio with Just Your Phone
I’ll say it: bad audio is even worse than bad lighting. If your viewers can’t understand what you’re saying, they’re gone. Instantly. While a dedicated mic is a great upgrade, you can get surprisingly clean audio from your phone’s built-in microphone if you know how to control your environment.
The two things that will ruin your sound are echo and background noise. To fight them, pick a room with lots of soft surfaces.
- Carpets
- Curtains
- Couches
- Beds
- Even a pile of laundry!
These things absorb sound and kill the echo that makes audio sound cheap. Honestly, a walk-in closet full of clothes is one of the best DIY recording booths you can find. Also, get as close to your phone as you can without messing up your shot. The closer you are, the clearer your voice will be compared to the room noise.
Before you hit record, just stop and listen for a minute. Is the air conditioner running? Is your dog barking next door? Are your phone notifications on? Turn it all off. These tiny steps make a huge difference in your final audio quality.
Film and Batch Your Content Like a Pro
If you want to grow on TikTok, consistency is everything. But let's be real—trying to dream up, shoot, and post a brand new video every day is a one-way ticket to burnout. The secret weapon that top creators use isn’t some superhuman energy source; it's a smart, efficient workflow. This is where content batching will completely change the game for you.
Batching is just a fancy term for filming a bunch of videos in one go. Instead of that daily scramble, you carve out a few hours, maybe once a week, and just crush all of your filming at once. This trick doesn't just save a ton of time; I've found it also makes my content way better and more consistent.
When you're not constantly under the gun to produce something right now, you can actually get into a creative flow. That translates to better energy on camera and a much more polished final video.
Building Your Batching Workflow
A good batching session is won or lost before you even press the record button. It all comes down to solid prep. I like to do this on a Sunday afternoon—I’ll sit down and map out what the next week of content looks like. I start with the core ideas and then sketch out a quick shot list for each one.
Then, it's time to gather all your gear and props.
- Outfits: I lay out every single outfit I'm going to wear. This little step makes a huge difference in creating visual variety so it doesn't look like I filmed everything on the same day.
- Props: Grab any products, gadgets, or random items you need for your shots and put them in one place.
- Scripts: Have your scripts or talking points ready to go, either printed out or on a tablet nearby.
Doing this prep work ahead of time is a lifesaver. It cuts down on decision-making when you're actually filming, so you can just move from one video to the next without losing that creative momentum. If you want to get really organized, you can learn more about planning your content with a TikTok content calendar template.
By dedicating just one afternoon to batching, I can film enough B-roll and core clips for 7-10 videos, freeing up my entire week to focus on editing and engagement.
The Filming Session Itself
Once your prep is done, the actual filming session becomes a breeze. Set up your camera and lights just once, and then start working through your shot list. A great strategy is to group similar shots together.
For instance, if you have three videos that all need a talking-head segment in the same spot with the same outfit, film all of those clips back-to-back. Get all the talking out of the way. Then, change your outfit or move to a new location to shoot all the B-roll or product demos you need for those videos.
This is so much more efficient than setting up and tearing down your gear for every single video. You minimize the boring stuff and stay in that high-energy headspace. You’ll be shocked by how much you can get done in just a couple of hours when you have a clear plan and everything is within arm's reach.
Editing to Hook Viewers in the First Three Seconds
You’ve got your footage, but don't get comfortable yet. The real magic happens in the edit. This is where you transform a collection of clips into a story that actually makes people stop scrolling. On TikTok, you don't have the luxury of a slow burn—you have about three seconds to give someone a reason to care. If you fail, they're gone.
That initial hook is your entire pitch. It's a split-second promise that what you've made is worth watching. Getting this right is what separates a video that gets a quick "like" from one that gets watched, shared, and saved.
Crafting a Killer Three-Second Hook
The first few moments of your TikTok have to be a pattern interrupt. Your job is to break the viewer's mindless scroll with something that instantly sparks curiosity or solves a problem.
Here are a few battle-tested ways to pull this off:
- Bold Text on Screen: Slap a provocative or intriguing statement right on the video. Think "You're cleaning your air fryer all wrong" or "The one travel hack that saved me $500." It’s direct and impossible to ignore.
- Start with the Payoff: For any kind of transformation or tutorial, show the incredible final result first. This creates an immediate "whoa, how?" moment that makes people stick around to see the process.
- Ask a Relatable Question: Kick things off with a question that your target audience has definitely thought about. It forges an instant connection and makes them want to hear your answer.
When you pair these ideas with quick, punchy cuts—changing the shot every second or two—you create an energetic intro that feels native to the platform. This rapid-fire pacing tells the viewer that your video is going to be dense with value and free of fluff.
Pacing: The Secret to Keeping Them Watching
Once you've hooked them, you have to keep the momentum going. Pacing is the rhythm of your video, and if you get it right, you can keep people engaged all the way to the end. This is where you need to be ruthless with your trimming.
Cut out every single dead second. Every awkward pause, every "um," every moment where nothing important is happening needs to go. Each clip should have a clear purpose.
This is more important than ever, as longer videos are gaining real traction. It's a fascinating trend: while the average TikTok is about 39 seconds long, videos that push past 54 seconds actually rack up way more views on average. People will watch longer content, but only if the pacing is absolutely perfect. You can dig into more TikTok video length trends on thunderbit.com.
A great edit feels invisible. The viewer gets so lost in the story that they don't even notice the cuts.
Picking the Right Editing Tools
The built-in TikTok editor is decent for simple jobs, but serious creators almost always move on to a dedicated app for more control. CapCut is the undisputed king here. It’s made by the same company as TikTok, it’s free, and it’s packed with features that feel like they were designed specifically for the platform.
Using an external app gives you a ton more power, especially for:
- Keyframing: This lets you animate text, stickers, and clips to create dynamic movement that looks super professional.
- Color Grading: You can adjust the colors to create a signature aesthetic or a specific mood.
- Audio Layering: Juggling voiceovers, music, and sound effects is way easier and gives you a much cleaner result.
Putting in a little time to learn an app like CapCut will dramatically elevate your content. If you want to see what else is out there, our guide on the best video editing apps for TikTok breaks down all the top contenders.
At the end of the day, your edit is all about building a seamless experience. Whether your video is a quick 15-second tip or a three-minute story, every cut and transition should work together to keep your viewer glued to the screen from that critical opening hook to the very last frame.
Your Top TikTok Filming Questions, Answered
Even with the perfect plan, you're bound to run into a few questions once the camera starts rolling. Let's tackle some of the most common hurdles creators face so you can troubleshoot on the fly and keep filming.
Should I Bother Filming in 4K for TikTok?
This is a classic case of bigger not always being better. You should actually avoid filming in 4K for TikTok.
Here’s why: TikTok compresses every video you upload and maxes out the resolution at 1080p. Filming in 4K just creates huge files that clog up your phone's storage and take forever to upload, all for zero gain in quality on the viewer's end. Stick to 1080p at 30fps—it’s the sweet spot for quality and efficiency.
Can I Use My Phone's Back Camera to Film?
Not only can you, but you absolutely should. Your phone’s rear camera is almost always leagues better than the front-facing selfie cam. We're talking sharper resolution, better performance in low light, and a much cleaner overall image.
It might feel a little awkward at first since you can't see yourself. A simple trick is to prop up a small mirror behind your phone or use a second device to monitor your framing. It's a tiny change that makes your video look instantly more professional.
So many creators get caught up in the creative side and forget that great video is a powerful business asset. When done right, your TikToks can directly drive sales and build a loyal following for your brand.
The numbers don't lie. A staggering 92% of TikTok users take some kind of action after watching a video, and 61% discover new brands and products right there on the app. It's especially huge for beauty brands, where 1 in 4 people have bought a product after seeing it on TikTok. You can dive deeper into these numbers with this breakdown of TikTok user behavior from The Social Shepherd.
What Are the Right Dimensions for a TikTok Video?
For the best results, you need to be shooting for a 9:16 aspect ratio. That translates to video dimensions of 1080x1920 pixels.
This vertical format is key because it fills the entire smartphone screen, pulling your viewer right into the content. While TikTok technically lets you upload square (1:1) or horizontal (16:9) videos, they'll show up with clunky black bars. Always shoot vertically to give your videos the immersive feel they need to succeed.
Stop the endless scroll for ideas and start creating content that connects. Viral.new sends you fresh, niche-specific TikTok concepts every single morning. You'll always have a trend-aligned idea ready to film. Get your daily shot of inspiration at https://viral.new.
